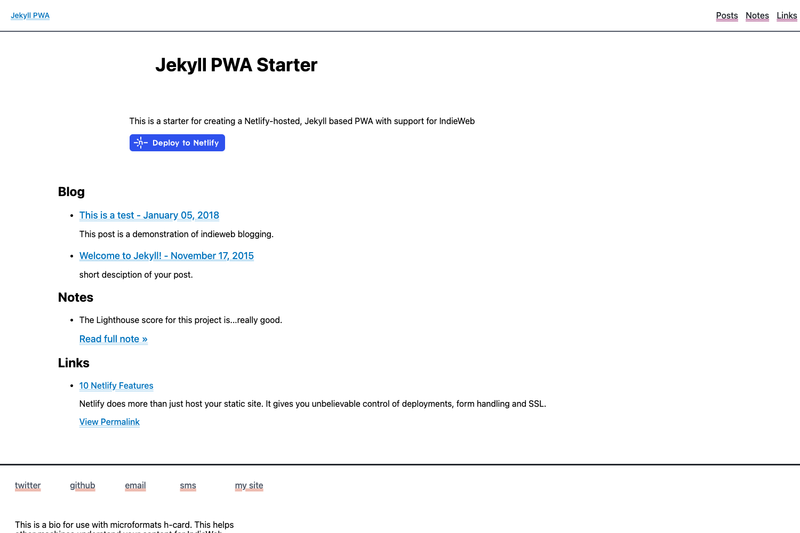
Jekyll PWA IndieWeb Starter is a Jekyll boilerplate that packages progressive web app features, IndieWeb microformats, webmention support, and Netlify CMS into a single GitHub repository for deploying personal blogs and content sites.
What is Jekyll PWA IndieWeb Starter?
Jekyll PWA IndieWeb Starter is a starter project for Jekyll-powered sites that gives you a running blog with offline caching, an app manifest, and IndieWeb publishing hooks out of the box. It takes a GitHub repository and a Netlify account as inputs and produces a deployment-ready static site with a CMS admin at /admin/. The project was created by Josh Vogt (GitHub user dumaurier) and is open source on GitHub.
Key Features
- Service worker app shell — A sw.js file pre-caches the manifest, home JavaScript, base CSS, and the root URL, while a runtime cache makes additional visited pages available offline. The cache name incorporates the site build timestamp so it automatically busts on each Jekyll build.
- Netlify CMS integration — The repo includes configuration for Netlify CMS with Identity and Git Gateway; after deployment you edit content at yourdomain.com/admin/ without a code editor.
- IndieWeb h-card microformats — Editing _data/about.yml populates name, bio, and social URLs (Twitter, GitHub, email, SMS, site) that generate h-card markup for IndieWeb publishing.
- Webmention support — The posts layout includes JavaScript to fetch and render webmentions from webmention.io and a simple form for visitors to send mentions manually.
- Critical CSS pipeline — Uses Filament Group's loadCSS to load the base stylesheet after inlined critical CSS. Home and posts pages have their own critical CSS files (e.g., home.scss and posts.scss in src/sass).
- Bootstrap option — The site settings let you switch between the purposefully sparse default framework and Bootstrap; saving changes in Netlify triggers a rebuild.
- One-click Netlify deployment — A deploy button creates a new site from the repo through Netlify's signup flow, letting you rename the repository and build immediately.
- Gulp and BrowserSync development — Locally, running gulp builds the Jekyll site and starts BrowserSync; gulp jekyll-build runs Jekyll with the jekyll-admin interface.
Who is it for?
- IndieWeb enthusiasts — People who want to own their content and be part of the IndieWeb can configure h-card and webmentions to display responses on their posts.
- Bloggers who avoid code — Netlify CMS provides a WYSIWYG-style editing interface so you can write posts without opening a text editor.
- Jekyll developers — Developers can fork the repo, adjust SCSS files, and use Gulp tasks to add or modify build steps.
- PWA-curious site owners — Anyone wanting offline support and an installable site with minimal configuration.
What can you do with it?
- Personal bloggers: Deploy a blog to Netlify with one click and manage posts from the /admin/ CMS interface.
- IndieWeb practitioners: Connect your domain to webmention.io, list social accounts in about.yml, and display webmentions on each post.
- Front-end developers: Use the Gulp workflow with BrowserSync and the jekyll-admin extension to preview edits in real time.
- Static site learners: Study how a service worker, critical CSS, and a git-gateway CMS fit together in a small Jekyll project.
How does it work?
The setup flow is described in the repository: fork the repo, edit _data/about.yml, deploy to Netlify via the one-click button or by connecting your GitHub repo, then enable Netlify Identity and Git Gateway so the CMS can write to your repo. The CMS becomes available at yourdomain.com/admin/. For local development, run bundle install, then npm install, then gulp.
Pros and cons
- Pros: No code editor needed to publish; PWA features are pre-configured; IndieWeb and webmention support are built in; Bootstrap can be swapped in from the settings.
- Cons: Webmention setup requires extra steps (webmention.io account and domain entry); the service worker's runtime cache can misbehave when developing locally with BrowserSync; BrowserSync is noticeably slower on Windows.
FAQ
Do I need to install anything locally?
If you use the Netlify deployment path, you do not need any local tools — the site builds on Netlify and you edit through Netlify CMS. For local development you need Ruby, Jekyll, Node.js, and Gulp.
How do I enable NetlifyCMS on my site?
After deploying to Netlify, open the Identity section in Netlify's top navigation and enable Identity. Under Identity settings, choose Services and click Enable Git Gateway. Optionally add GitHub as an external authentication provider so you can sign in with your GitHub credentials.
How do I set up webmentions?
Go to webmention.io and sign in with your domain (after publishing your site). Add that domain to the webmention entry in _data/about.yml. The site build will then include the correct endpoints, and the posts layout will fetch and render mentions.
Why is my service worker cache always updating?
The service worker's cache name includes the Jekyll build time (using the site.time Liquid variable), so every new build creates a fresh cache. If you do not want that behavior, remove that cache name line from sw.js.
Can I use Bootstrap with this starter?
Yes. The settings section lets you change the CSS framework from the default sparse framework to Bootstrap. After you save the change, Netlify rebuilds the site with Bootstrap's styles.